Creating Daily Itineraries using Google Maps
I had a chat with my friend (Wandi) during lunch time one day and he inspired me to write up this guide. After talking to some friends it seemed that not many people know that they can create their own maps using Google Maps. I wasn't an expert at it too and only just discovered it last year. This time instead of putting markers on interesting attractions, train stations and restaurants, I'd used it to create my daily itineraries.
1. Create new map
To do this just create or sign in to your google account. Then go to maps.google.com or https://www.google.com/maps and click on your places. After that, click on 'maps' and click on 'create map'.


2. Name your itinerary
If you click on the 'untitled map' then you can easily rename it to anything that you want, the same with 'untitled layer'.


3. Search and add places to your 'layer' or 'itinerary'
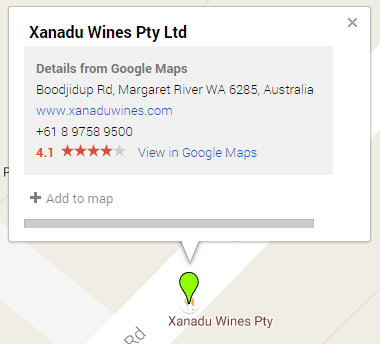
This is the fun part, you can just search for any places using the search bar at the top. For example I'd search for Xanadu wines. When it came up with the result, I then clicked on Xanadu. A green marker will appear on the map to show the location along with a box. Next I just clicked on '+add to map' which is located at the bottom of the box :-)


4. Change up your style / marker
I love how Google created cute icons that can be used for each style. My favourite is still the sequence style which is really useful when you travel to a lot of places in one day. The default style will be set to 'individual styles'. You can click on each place which will resulted in another pop up information and click on the paint icon at the bottom of the white box. There you can choose the colour and icon that you want to use for the place.

5. Add personal / more information to the place
There are 4 icons that you can use when you click on a place. The first one is the paint icon to change up your style, then the pencil icon to add any information that you want. The photo icon can be used to upload one or some photos for your reference. The next one is the direction icon to create a route from place A to B. Then the trash icon to delete the place or you can use the 'delete' button on your keyboard.


6. Share your map or invite someone to edit / view only
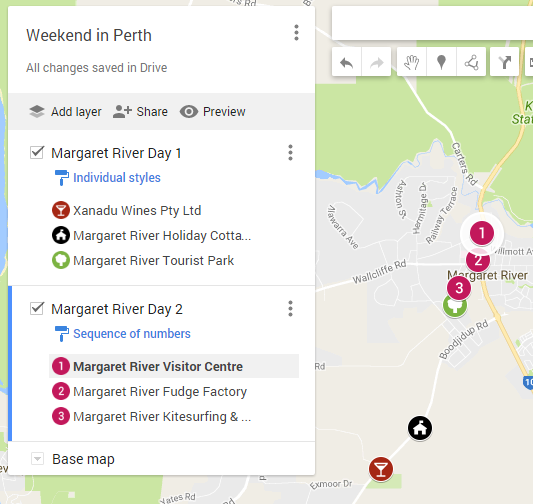
Below you can see the sample of itinerary with sequence. Sequence is really useful if you need to follow certain route. On the right screenshot you can see what happens when you click on 'share' button next to the 'add layer' button. Once you're done with the map you can share it to everyone you want or invite specific people to become the owner / editor or just audience.

What does it look like on your phone?
Open up Google Maps on your phone, click on the three bars 'menu' at the top left and go to 'your places'. Choose your map. If you click on 'view map legend' then it will shop up with more information. If you put on any information on the place before then it will also show up on the mobile app.


One question remains for any overseas traveller: 'how can we use our maps offline' and this was also the question that I raised after creating 20 days of itineraries! Find out more about it here ;-).